Blog 4: Image Sizer

Blog 4: Image Sizer – Slider Bar
What are the three major problems encountered for shopping in walk-around stores?
1 Not enough choices
2 Not enough sizes
3 Not enough colors
Fine Art America can be a big help in solving all three of those problems. They have:
1 more than a million artists with websites and offers;
2 multiple size options on most products;
3 color patches and Color-Shade-Tint-Tone options for over a million colors.
The first problem is easy to solve. Currently, there are billions of choices in at least ten Popular Categories with more than 50 products:
1 Wall Art
2 Art Media
3 Home Décor
4 Lifestyle
5 Beach
6 Tech
7 Men’s’ Apparel
8 Women’s Apparel
9 Youth Apparel
10 Stationery
Second, almost all products will have multiple sizes … and many will have different orientations (i.e., natural, vertical, horizontal, and square).
Third, with more than 16 million color choices … matching your favorite colors will be fantastic!
There are two major tools that can be used to improve our selections of products on Fine Art America.
The first tool is called IMAGE SIZE. Most people refer to it as the SLIDER … because it can slide left or right with the Mouse Button to decrease or increase an image size and border on a product (i.e., the relative relationship between any border present and the actual image).
The Mouse Button can also be used sometimes … to move an image up or down for placement on a product … during the sizing and placement process (i.e., when using the Image Size option)
IMAGE SIZE (i.e., SLIDER BAR)
A few more details about the Image Size option could be helpful for many people who have not learned to use it to their advantage yet. Note: It can be found in almost all categories, except NOT in Wall Art.
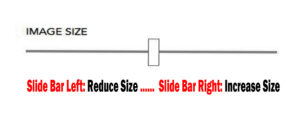
The IMAGE SIZE (on a product) is controlled by the Slider … located on a horizontal line. Move the Slider left to reduce the image size … or right to increase the image size. See the image below (i.e., Slider Bar on the horizontal line).
You can control three things on most products with the IMAGE SIZE option:
1 The Image Size on the product;
2 The Border Size on the product. *
3 Completely remove Border from some products (i.e., move Slider Bar to the right).
* Note: On many products (i.e., greeting cards) … decreasing the border size will increase the images size … and increasing the border will decrease the image size. But on some products (i.e., some Carry-all Pouches) the image size and border size do not influence each other because they are in different color layers.
For example, you can completely remove a border on a greeting card and fill the card front with just the image by moving the Slider Bar all the way to the right (i.e., the border is completely absent on the card).
You can experiment with the Slider Bar option on many products in most categories (except, NOT in Wall Art) to see which options or sizes you prefer for the image and the border.
When we get to color options you may find that the border color you choose could have a big impact on the size of the background (i.e., or image size) that you want to use for best effect.
Image Size Slider Options/Uses:
Let’s run through a tutorial for the Image Sizer (i.e., Slider) to show how this tool can be used effectively on products where it is available.
I am going to choose one of my coffee mugs because it has both text and an image to work with.
The image I am going to use is on my own website … but this process should work the same on hundreds of thousands of other FAA artists’ websites.
Slide the Slider to the left to decrease image size (on any product where you have this option) … and to the right to increase the image size.
In many cases, the Slider may also be used to position the image on the product as well (i.e., don’t be afraid to experiment with your images to find out what will work on any product).
You can use the Slider to position the image on the cup … and can move some text from the image that appears on the cup (and notice two of 16 million possible coffee mug colors we talked about).
Note: I have found only 17 web-safe colors in the FAA Color Patch display … but I have not personally experienced any difficulty when ordering products from Fine Art America when using them.
NOTE: The Image Size Slider is active on many products on most FAA websites … EXCEPT … it is Not available on most Wall Art options.
⇒ Click > https://mitchell-watrous.pixels.com/
⇒ Click > Collections
⇒ Click > Coffee Mugs – Card Games
⇒ Click > Ambush Power Poker [Image with Ace of Heart]
⇒ Click > Coffee Mugs $17 V
⇒ Click > Coffee Mug $17
⇒ Click > inside SIZE box
⇒ Click > Small (11 oz.) … or Click > Large (15 oz.)
You should notice several things about the image for Ace of Hearts Coffee Mug:
1 There is advertising text above and below the image.
2 The image text advertises a new Poker book (above) and the author (below).
3 The Background Color is Grey 2 (See color tutorial in Chapter 5 to change that.)
What are our Image Size options? We have several simple options. Just put the mouse button over the Slider Bar and hold it down … and the Unwrapped Image below is what you should see:
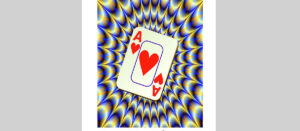
This Unwrapped Image above will show you what is happening on your coffee mug. When you put the mouse pointer over the Slider Bar … and while holding down the Left Mouse button …. move it left or right to see the image sizes change. Release the mouse button when you have the image you want.
We can accept the coffee mug as shown below in the Unwrapped Image without changes. All the original text and image will appear on the cup just as you see it in the image below when you release the mouse button from the Slider Bar:
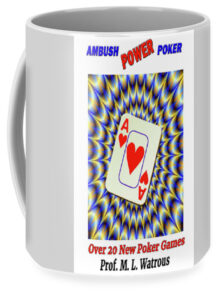
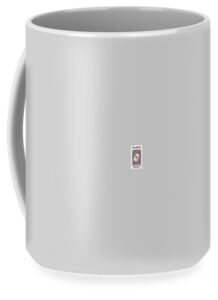
We can slide the Slider all the way to the left … and this is what we see on the coffee cup below … the basic background border color (Grey 2) of the cup with a very small image in the center.
We can slide the Slider all the way to the right … and this is what we see on the coffee cup below … the basic background border color of the cup with a very large, over-lapping image in the center.
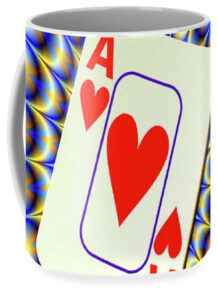
You can slide the Slider Bar left and right until you center the image on the Unwrapped Image indicator … without any text … as shown below:
Then, your coffee mug should appear as shown below … when you release the Left Mouse button.
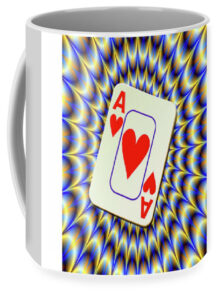
OK, what if we would like to have the only the top or the bottom text appear on the coffee mug? For example, what if we wanted to use this coffee mug for advertising purposes?
Go back to the coffee cup image you just created on the website … and you can make those adjustments on the image of this coffee cup. Just to make sure there is no confusion … here is the one you just created (or, go back and generate it again):

Click > Coffee Cup Image … and hold down the left mouse button … and it should display the corresponding Unwrapped Image for you.
With the left mouse button depressed … slide the image up or down (i.e., on the Unwrapped Image) to get the text you want to display on the coffee cup … and then release the mouse button when you have the image and text positioned where you want it.
Note: Play around with this until you get your image and text positioned where you want them. You might have to click or double click the image after you have positioned and released your mouse button (i.e., some computers may respond differently … but you should be able to get this to work for you with some experimentation).
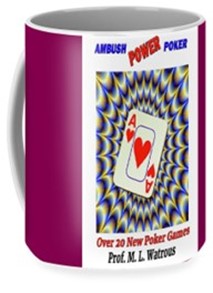
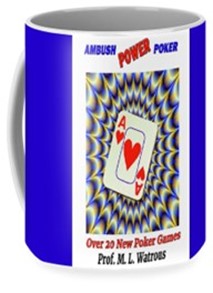
Here are two examples of what you can do with this technique:
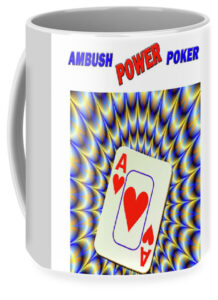
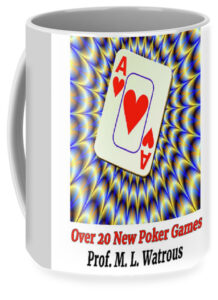
We can experiment with changing Background Colors on the coffee mug … millions of colors!!! More about this is covered in Blog 5.
How can you get the book? Once again … here is the information:
| https://www.amazon.com/dp/B0BTFRP4P3 | [$4.97] eBook |
| https://www.amazon.com/dp/0981862845 | [$11.97] Print Book |
The print book is also very good … and many people prefer to have a print book in addition to an eBook.


